Deploying a Web Application to Ocelot
If you are developing locally in NetBeans, then you are using a Web Project.
This is an abstraction of a web application. The Tomcat server on
ocelot needs the files to be placed in a standard web application.
Copying the files individually from the Web Project to the web application
is tedious and error prone. This process is automated in NetBeans.
Create the WAR file
-
Open the
Files tab in NetBeans.
-
Right-click the project name, choose
Properties and select
Packaging Project option, and remove the filter for
**/java.*. This step only needs to be done once per project.
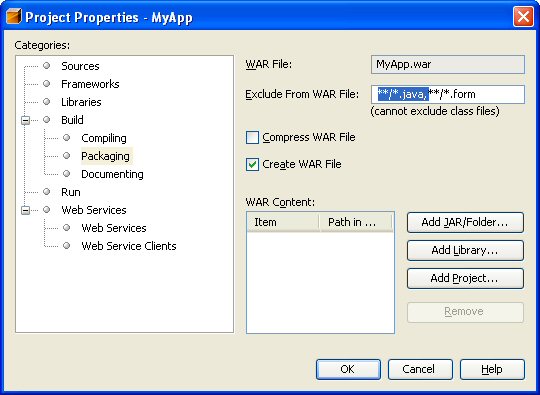
-
Select OK.
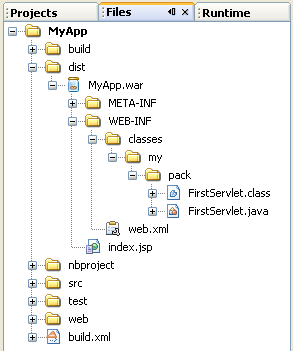
-
From the
Build menu, select Clean and Build Main Project.
-
Open the
dist folder in the Files tab. You should
see the war file for your project.
Upload the WAR File
In order to deploy a web application to ocelot, upload the WAR file to the cgs4854
directory. Do not upload directly to the webapps folder.
Unzip the WAR file
There are two choices for unzipping the WAR file.
- Log onto ocelot and use the ls (el-ess) command to see the name of the WAR file in the cgs4854 directory
ls cgs4854
If the name of the war file is MyApp.war,
then execute the following command to unpack the WAR file.
unzip -o cgs4854/MyApp.war -d cgs4854/webapps/MyApp
- Alternatively, you can unzip the WAR file using WinSCP. Use WinSCP to upload the
WAR file to ocelot. Right click the name of the WAR file in the remote window of WinSCP.
Select Custom Commands and then Enter. If the name of the war file is
MyApp.war, then enter the following command into the command box and hit enter.
unzip -o MyApp.war -d webapps/MyApp
After unzipping the WAR file, Tomcat will automatically deploy it. You may access it from your
student host as
http://studentXX.cgs4854.cs.fiu.edu:8008/MyApp/
Storing the Unzip command
If you are using WinSCP, then you can store a custom command that can be used to unzip
any WAR file.
- Select the menus Files -> Custom Commands -> Customize
- From the dialog that appears, click Add
- Enter the description "Unzip to webapps"
- Enter the command
unzip -o "!" -d webapps/`ls "!" | awk -F '.' '{print $1}'`
- In the future, upload a WAR file to cgs4854, right click the WAR and execute the saved command to unzip it.